
A Live Activity is an iOS interface element that allows you to see up-to-date information such as the progress of a task, activity, or event at a glance.
Using Live Activities in your app can offer an enriched experience through deep integration with iOS.
For this article, we'll be using Expo, the development platform for React Native. Expo enables, among other things, the use of React Native code in JavaScript or TypeScript across iOS, Android, and the Web. Recently, Expo has introduced support for native module development, paving the way for writing code specific to a particular platform - Swift for iOS, Kotlin for Android - without the need to eject from the Expo project (Bare Workflow).
All the code required for the proper functioning and maintenance of a Live Activity is provided in two GitHub repositories: one for the interface as an Xcode project and one for the control module as an Expo native module.
Prerequisites
To get the most out of this article, you should ideally have:
- Basic knowledge of the Expo development platform and TypeScript.
- Basic programming skills to understand Swift, but no prior experience is needed.
- XCode 15+ to be able to develop in an IDE. Not essential if you use EAS Build, but you won't see the result before compiling.
Implementation with Expo
To create Live Activities, there are two necessary elements written in native code:
- The code defining the interface for the "Dynamic Island" and the lock screen banner.
- The code defining the control API for this activity, to be able to start and end it.
Here is an overview of what a Live Activity interface looks like in practice:
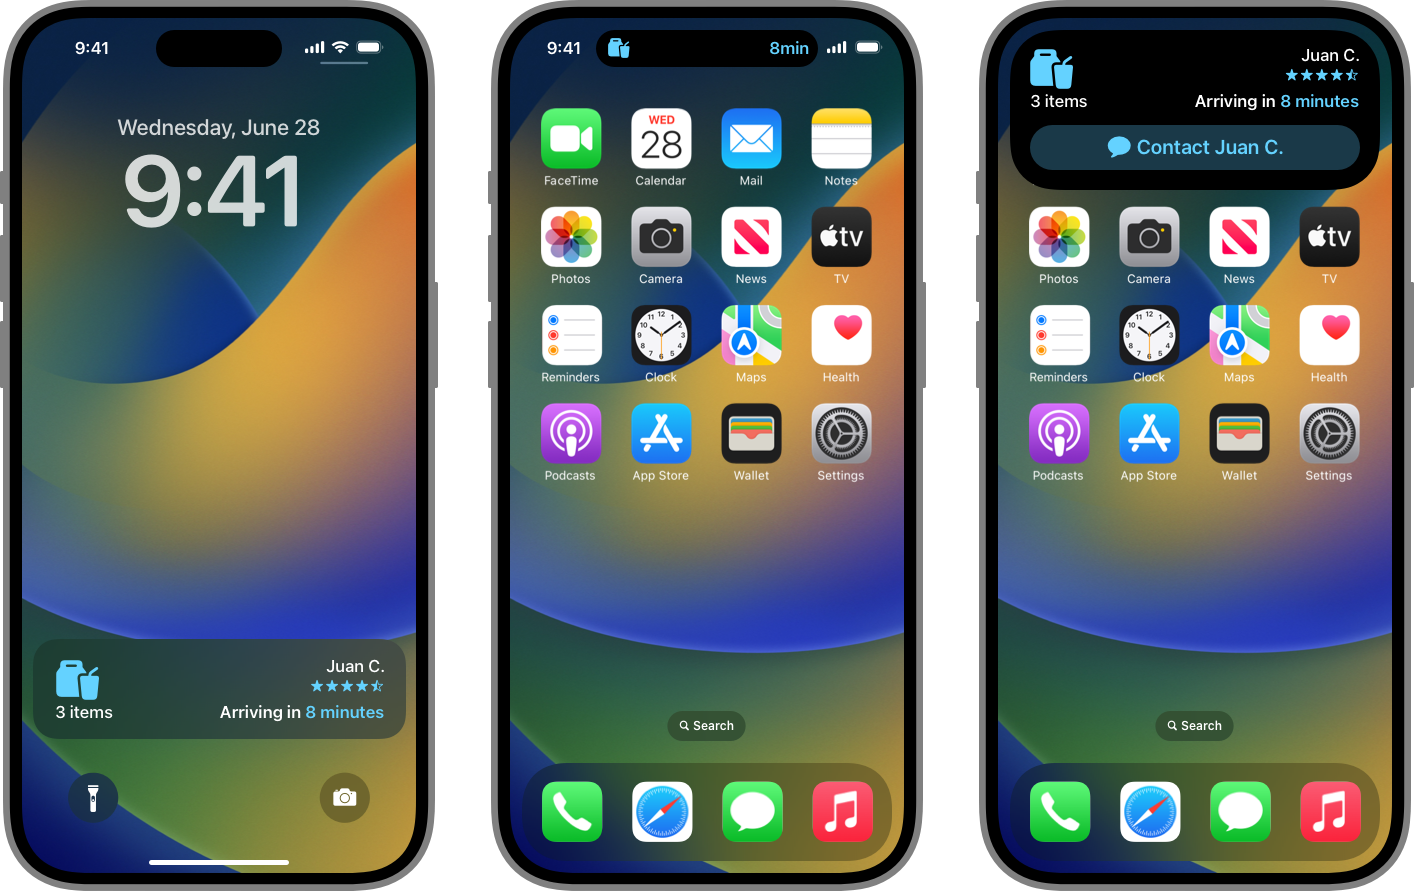
The Interface of Live Activities
Let's start by creating the visual interface of the activity as the user will see it. The purpose of this article is to explain how to integrate this interface using Expo and React-Native, rather than focusing on its development. The most effective way to get acquainted with Live Activities is probably by following the official documentation on the subject while setting up a simple Xcode project to get familiar with Swift and develop the extension. There are also numerous videos on YouTube that can help to better understand the implementation.
To facilitate the process, we have made available a GitHub repository with a basic functional project. This code will be reused in the implementation with Expo. It contains 2 applications or Targets. In the "Fizl" folder is the classic iOS application and in the "Fizl Activity" folder is what Apple calls a Widget Extension.
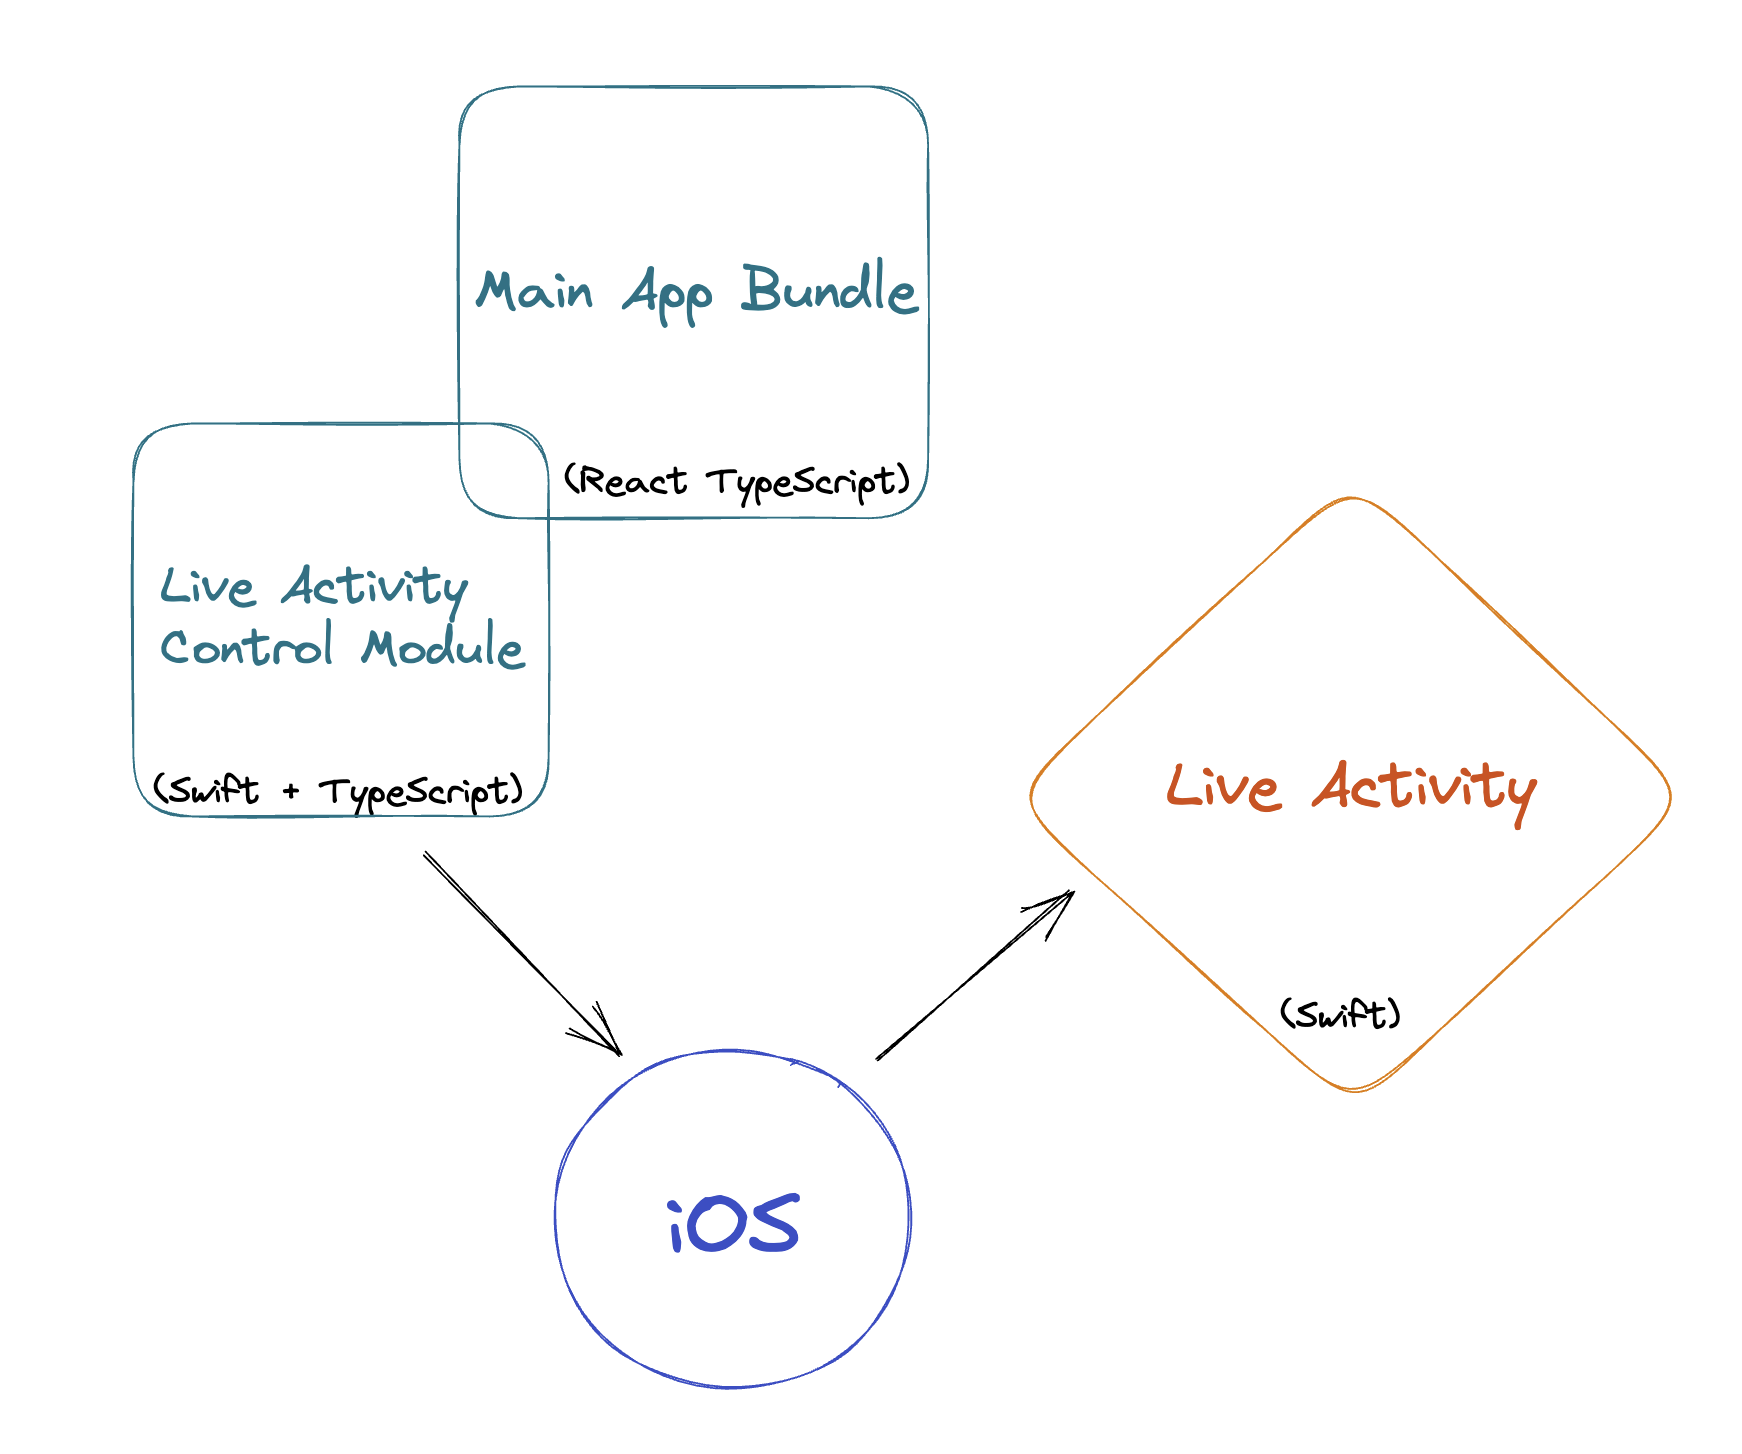
In this schema, the interface is defined by the Live Activity component. The control API is defined by the Live Activity Control Module module. We will start by taking an overview of the interface code to better understand how it works.
To implement a Widget Extension (Live Activity is also a widget), you need to create a second Target with Expo. Fortunately, there is a plugin that allows adding targets to an Expo project: expo-targets. Simply follow the instructions in the plugin's README.
At the time of writing this article, in the README of expo-target, "teamId" should rather be "appleTeamId".
Our configuration of the expo-target.config.js file is as follows:
/** @type {import('@bacons/apple-targets').Config} */
module.exports = {
  type: 'widget',
  name: 'Live Activity',
  frameworks: ['SwiftUI', 'ActivityKit'],
};
We then copied and pasted the files Fizl_LiveActivity.swift, Attributes.swift, Assets.xcassets, Info.plist, and finally, we renamed Bundle.swift to index.swift to be compatible with expo-target.
If you compile the app with eas build at this stage, eas will ask you to sign this new extension (eas will simply guide you through the steps). All that remains is to control the activity.
Controlling a Live Activity from React-Native
The interface code is somewhat an isolated application from our main application. Therefore, it cannot interact directly with it. A separate Expo native module, specifically designed to interact with the activity, is needed. Fortunately, interaction with an activity is done using the Activity class, which interacts with iOS.
To create an Expo native module, simply use the command npx create-expo-module@latest --local. Your module will be created in the modules folder. We make available the module we use at Fizl in a GitHub repository. You will need to adjust the code specifically for your activity, but the structure and file names can remain the same.
Let's briefly go over how the module works.
First, you will notice that the file Attributes.swift is present both in the module and in the activity interface code. It is essential that this code remains identical, because iOS recognizes which activity to control through this struct.
Next, the native control code is found in the file LiveActivityControlModule.swift. To maintain compatibility with iOS 13 as the minimum target, we use conditional compilation to only make certain parts of the code available on iOS 16. The functions startActivity and endActivity take a list of parameters that will be passed to the activity.
To end an activity, parameters must still be passed, as it is possible to leave an activity displayed on the lock screen once finished by using dismissalPolicy: .default.
These functions are accessible, but without type generation, thanks to the LiveActivityControlModule imported into index.ts. To type the functions to ensure the reliability of the interface, we have wrapped and typed these functions.
Now, you can use the exported functions from the index like startActivity to control activities.
  if (areActivitiesEnabled()) {
    startActivity({
      startTime: startDate,
      endTime: endDate,
      headline: headlineString,
      title: titleString,
      widgetUrl: deepLinkUrl,
    });
  }
Before calling the function that starts the activity, we check that activities are indeed supported on the device.
By executing this code from your application code, you should see your activity on the lock screen and in the "Dynamic Island" space!
Limitations
Live Activities display information about a task with a beginning and an end. Due to their nature, they have some limitations:
- If the activity lasts more than 12 hours, iOS will automatically end it.
- Live Activities cannot make web requests, so they cannot easily load images hosted on the web. However, it is possible to pre-load these images and share them in the App Group (local storage) so they can be retrieved by the Live Activity. A code snippet is available on the Apple developers forum.
- Live Activities updates are done using push notifications. We leave this as an exercise to the reader. You can learn more in the official Apple documentation.
Conclusion
Live Activities offer a unique opportunity to enrich the user experience on iOS. By integrating them into your applications via Expo, you can not only improve user engagement but also offer innovative and practical features. Do not hesitate to experiment and explore all the possibilities they offer.
To enhance your application, you can create Widgets. This involves simply adding Widgets, which are defined in Swift, to the folder that contains the interface (Live Activity). Make sure to export them in the index.swift file. For further details, refer to the official Apple documentation.